1. Installation and Login
The warehouse app runs on mobile browsers (PWA) at the address provided by DeliTMS — select "Add to Home Screen" to use it like an installed application. Log in with your company code + email + portal account password (warehouse/post office staff account — Chapter 01, Section 4); no need to create a separate app account.
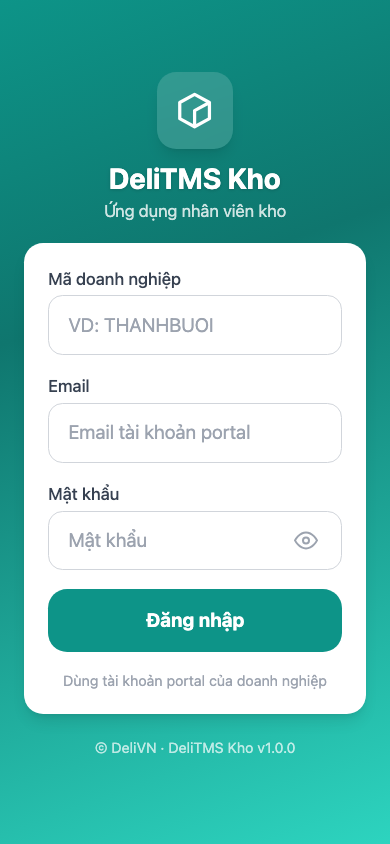
Log in with company code + portal account.
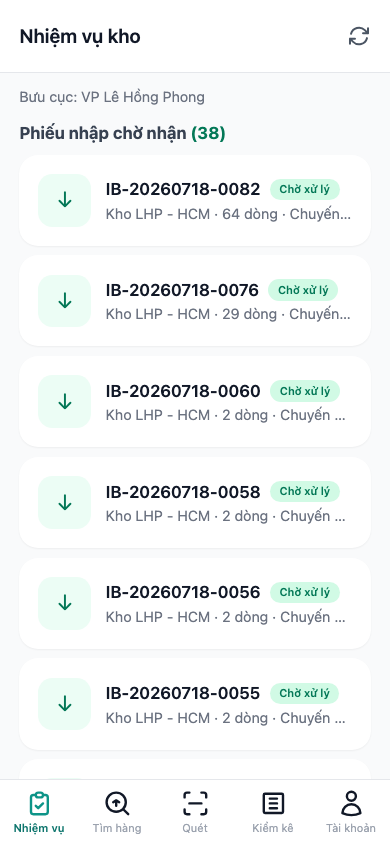
Warehouse tasks — pending inbound receipts, pending outbound picks.
Data scope by post office: accounts assigned to a specific post office only see receipts from their own warehouse (post office name displayed right below the title); accounts not assigned to any post office see enterprise-wide data — same principle as portal (Chapter 06, Section 5). When offline, you can still view the most recent saved version of the task list (app shows "Offline — viewing saved version").
2. Warehouse Tasks
The home page (tab Tasks) consolidates two jobs warehouse staff must do, automatically pulled from operations (Chapter 06, Sections 1–3):
- Pending inbound receipts — goods arriving at the post office (inter-provincial trucks unloading, goods collected at counter...) that already have inbound receipts created on portal;
- Pending outbound picks — approved outbound receipts (delivery, transfer, return, wave picking) waiting to be picked.
Tap on a receipt to open the corresponding operation screen.
3. Receiving Goods and Assigning Bin Locations (Inbound Receipts)
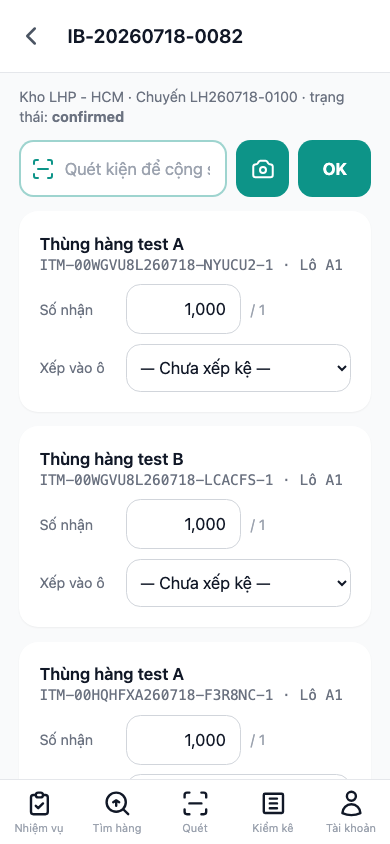
Inbound receipt — scan packages to increment received qty, select "Assign to Bin" for each line.
Warehouse workflow:
- Scan packages to increment received quantity — the scan box at the top of the page accepts handheld scanners (scan barcode + Enter) or phone camera (camera button, only shows on supported devices); scan any package, the corresponding line item automatically increments and flashes. You can manually edit Received Qty when there's a discrepancy (shortage/damage);
- Assign to Bin — for each line, select storage location following the Zone › Rack › Bin tree already configured in the warehouse layout screen (Chapter 06); skip if not storing yet — you can still track it later but the Find Goods section will show "bin not assigned";
- Confirm receipt — app records inventory immediately, receipt changes status on portal, data matches one-to-one with the Inventory screen.
4. Picking Outbound Receipts
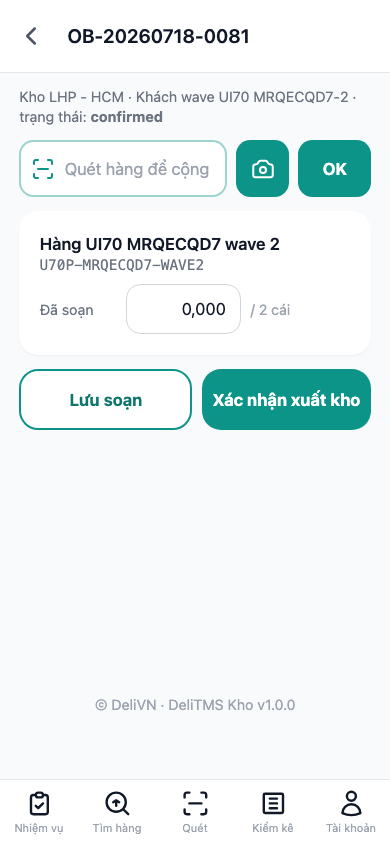
Outbound receipt — scan goods to increment "Picked", then tap "Confirm Outbound".
Open pending outbound receipt → scan each package when picking from rack (or manually enter "Picked" quantity) → Save Pick to save work in progress, or Confirm Outbound when all goods are ready — inventory deducts immediately, receipt changes to shipped status on portal. Receipts belonging to wave picking (Chapter 06) also appear here as individual sub-receipts.
5. Finding Goods and Navigation to Bin Locations
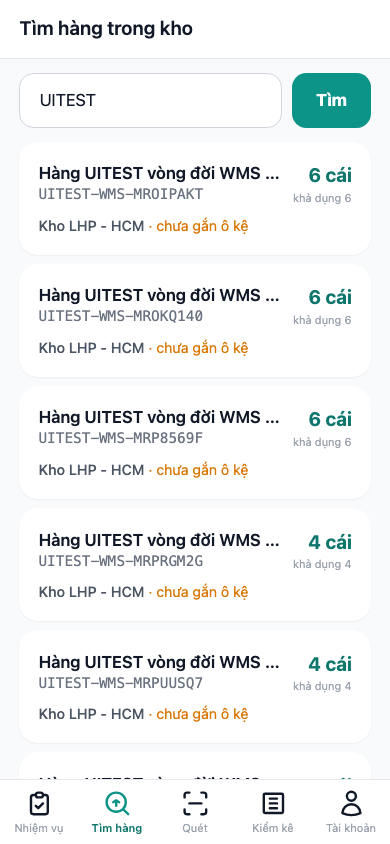
Find goods — enter code / name / lot, see stock + available + location.
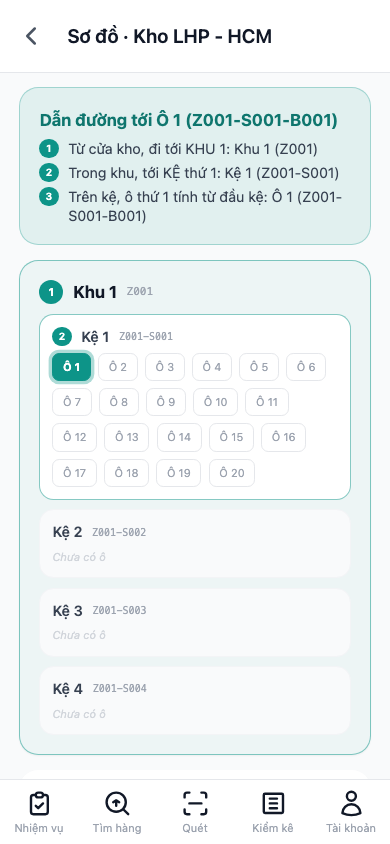
Warehouse map — step-by-step navigation, target bin highlighted.
Tab Find Goods: enter product code / product name / lot number (minimum 2 characters) → each inventory line shows stock quantity, available quantity (already deducted reserved for outbound receipts) and location Zone › Rack › Bin. Tap Navigate to open Warehouse Map: app provides step-by-step directions (which zone to enter, which rack number, which bin number on rack) and highlights the correct bin — even new staff can find goods without asking. This feature streamlines inventory management by making goods easy to locate. Goods showing "bin not assigned" means no bin was selected during receiving — can still be shipped normally.
6. Universal Barcode Scanner
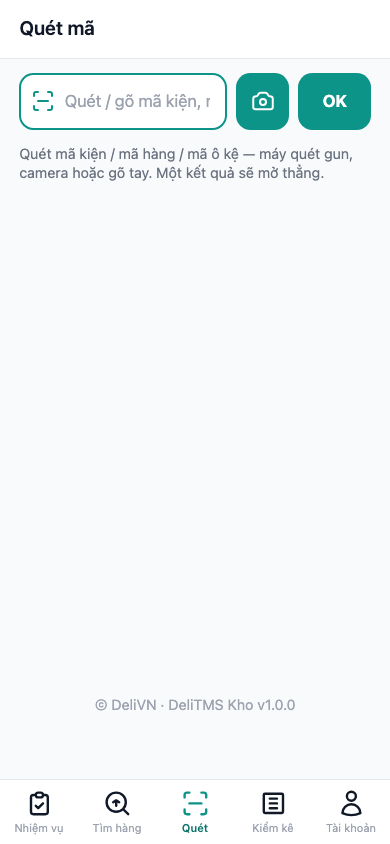
Scan barcode — scan any code, app automatically recognizes and opens the correct screen.
Tab Scan accepts any barcode and automatically recognizes: package code belonging to inbound/outbound receipt → opens that receipt directly (package already scanned); bin location code → opens warehouse map at the correct bin; product code → navigates to inventory location. Use when holding an "unknown" package without knowing which receipt it belongs to.
7. Stocktaking
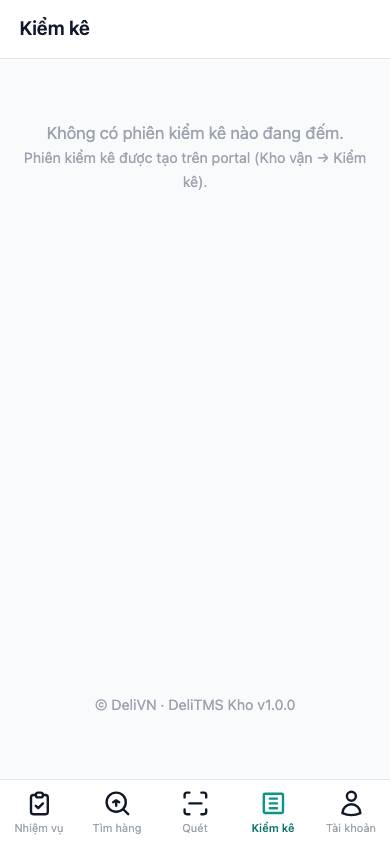
Stocktake tab — shows counting sessions for your warehouse.
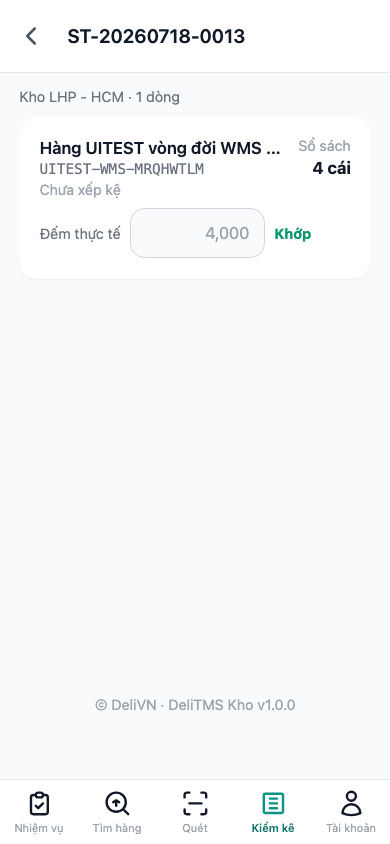
Count actual quantity per line — when matching book quantity, app shows "Match".
Stocktake sessions are created by office on portal (Warehouse → Stocktake, Chapter 06); when session changes to counting status, app displays that session for warehouse staff: follow the line list (pre-sorted by zone/rack/bin), enter Actual Count — when matching book quantity app shows Match, when different it records the variance for office to process adjustments on portal.
8. Frequently Asked Questions
Can't log in? — Use the correct portal account (email, not phone number); check company code and that account is still active.
Don't see receipt just created on portal? — Tap the refresh button in the upper right corner of Tasks screen; check that receipt belongs to your post office's warehouse (data scope follows assigned post office).
Stocktake tab is empty? — App only shows sessions in counting status; draft/pending approval/completed sessions don't show — check session status on portal.
Scan not recognizing barcodes? — Enter code using keyboard then tap OK/Search; camera button only shows on devices that support barcode recognition (Android Chrome).
Log out / change device? — Tab Account → Log out; logging in on new device will automatically log out old device session (one app session per account).